Django REST Framework and React: The Perfect Stack for Building Modern to-do Web application
Learn how to build modern To-do web application using Django REST Framework and React, providing a powerful and flexible stack for creating efficient web apps
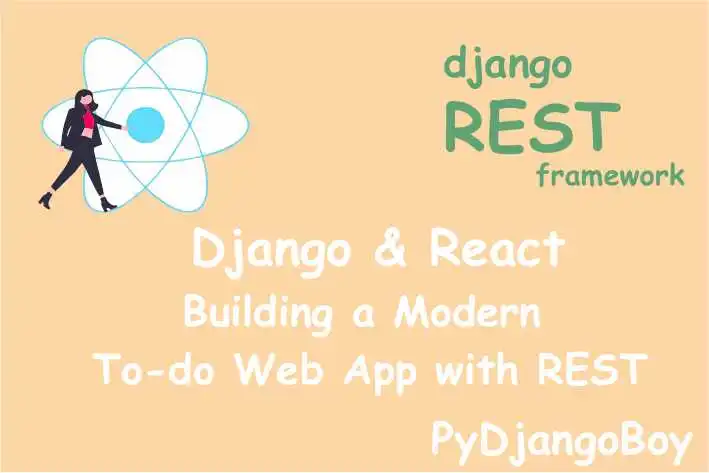
Django REST Framework and React: The Perfect Stack for Building Modern to-do Web application
Learn how to build modern To-do web application using Django REST Framework and React, providing a powerful and flexible stack for creating efficient web apps
In this post, we will walk through the steps of building a simple to-do application using Django Rest Framework (DRF) and React. We will use DRF to build the API for the to-do application, and React to build the frontend.
Django is a high-level web framework for building web applications using the Python programming language. It follows the Model-View-Controller (MVC) architectural pattern, and is known for its emphasis on reusability and "batteries included" philosophy.
Django REST framework is a powerful and flexible toolkit for building Web APIs. It provides a simple and consistent interface for interacting with databases and handling HTTP requests and responses.
React is a JavaScript library for building user interfaces. It focuses on the declarative approach to programming and allows developers to build reusable UI components. React is often used in combination with other libraries or frameworks, such as Redux, to handle application state, and with other libraries or framework,such as Django, to build full-stack web applications. Together, Django, Django REST framework, and React provide a powerful and flexible stack for building modern web applications.
Prerequisites
- Python 3.7+
- Django 3.1+
- Django Rest Framework 3.11+
- React 16.13+
- Node.js 10+
- npm 6+
Here are the official download links for Django and Django Rest Framework:
- Django: https://www.djangoproject.com/download/
- Django Rest Framework: http://www.django-rest-framework.org/#installation
You can also install both of these libraries using pip, the Python package installer. To install Django, you can use the following command:
pip install DjangoTo install Django Rest Framework, use the following command:
pip install djangorestframeworkYou also can install latest python version from official website https://www.python.org/downloads/
Once you have Django and Django Rest Framework installed, you can start using them to build your project. You can find tutorials, documentation and examples for both libraries on their official websites.
- Django: https://docs.djangoproject.com/
- Django REST framework: http://www.django-rest-framework.org/
Please keep in mind that you should be using a supported version of python for the version of django and DRF you are using.
Setting Up the Django Project
First, let's create a new Django project using the following command:
$ django-admin startproject myprojectNext, navigate to the project directory and create a new Django app:
$ cd myproject
$ python manage.py startapp todo
Installing Django Rest Framework
To install Django Rest Framework, run the following command:
$ pip install djangorestframeworkThen, add rest_framework to the INSTALLED_APPS list in the settings.py file:
INSTALLED_APPS = [
    ...
    'rest_framework',
]
Creating a To-Do Model
Let's create a ToDo model with a title field and a completed field:
from django.db import models

class ToDo(models.Model):
    title = models.CharField(max_length=255)
    completed = models.BooleanField(default=False)
Then, run the following commands to create the necessary database migrations:
$ python manage.py makemigrations
$ python manage.py migrate
Creating a Serializer
Next, let's create a serializer for the ToDo model using Django Rest Framework:
from rest_framework import serializers

class ToDoSerializer(serializers.ModelSerializer):
    class Meta:
        model = ToDo
        fields = ('id', 'title', 'completed')
Creating a ViewSet
Next, let's create a ToDoViewSet using Django Rest Framework's ModelViewSet class:
from rest_framework import viewsets

class ToDoViewSet(viewsets.ModelViewSet):
    queryset = ToDo.objects.all()
    serializer_class = ToDoSerializer
Registering the ViewSet
Next, let's register the ToDoViewSet in the todo/urls.py file:
from django.urls import include, path
from rest_framework import routers
from . import views

router = routers.DefaultRouter()
router.register(r'todos', views.ToDoViewSet)

urlpatterns = [
    path('', include(router.urls)),
]
$ mkdir todo-app
$ cd todo-appNext, create a new React app using the following command:
$ npx create-react-app .Installing Dependencies
Next, let's install the following dependencies:
$ npm install axios react-router-domCreating the To-Do List Component
Let's create a ToDoList component that fetches the list of to-dos from the API and displays them in a list:
import React, { useState, useEffect } from 'react';
import axios from 'axios';

const ToDoList = () => {
  const [todos, setTodos] = useState([]);

  useEffect(() => {
    const fetchTodos = async () => {
      const res = await axios.get('http://localhost:8000/todos/');
      setTodos(res.data);
    };
    fetchTodos();
  }, []);

  return (
    <ul>
      {todos.map(todo => (
        <li key={todo.id}>{todo.title}</li>
      ))}
    </ul>
  );
};

export default ToDoList;
Rendering the To-Do List
Next, let's render the ToDoList component in the App component:
import React from 'react';
import ToDoList from './ToDoList';

function App() {
  return (
    <div className="App">
      <h1>To-Do App</h1>
      <ToDoList />
    </div>
  );
}

export default App;
Running the App
To run the app, start the Django server using the following command:
$ python manage.py runserverThen, navigate to the todo-app directory and start the React app:
$ cd todo-app
$ npm start
The React app should now be running on http://localhost:3000/. You should see the list of to-dos displayed on the page.
Adding To-Dos
Let's add a form to the App component that allows users to add new to-dos to the list:
import React, { useState } from 'react';
import ToDoList from './ToDoList';
import axios from 'axios';

function App() {
  const [title, setTitle] = useState('');

  const handleSubmit = async e => {
    e.preventDefault();
    await axios.post('http://localhost:8000/todos/', {
      title,
      completed: false
    });
    setTitle('');
  };

  return (
    <div className="App">
      <h1>To-Do App</h1>
      <form onSubmit={handleSubmit}>
        <input
          type="text"
          value={title}
          onChange={e => setTitle(e.target.value)}
        />
        <button type="submit">Add</button>
      </form>
      <ToDoList />
    </div>
  );
}

export default App;
Updating To-Dos
Let's add a checkbox to the ToDoList component that allows users to mark to-dos as completed:
import React, { useState, useEffect } from 'react';
import axios from 'axios';

const ToDoList = () => {
  const [todos, setTodos] = useState([]);

  useEffect(() => {
    const fetchTodos = async () => {
      const res = await axios.get('http://localhost:8000/todos/');
      setTodos(res.data);
    };
    fetchTodos();
  }, []);

  const handleChange = async todo => {
    await axios.patch(`http://localhost:8000/todos/${todo.id}/`, {
      completed: !todo.completed
    });
    const updatedTodos = todos.map(t =>
      t.id === todo.id ? { ...t, completed: !t.completed } : t
    );
    setTodos(updatedTodos);
  };

  return (
    <ul>
      {todos.map(todo => (
        <li key={todo.id}>
          <input
            type="checkbox"
            checked={todo.completed}
            onChange={() => handleChange(todo)}
          />
          {todo.title}
        </li>
Removing To-Dos
Let's add a button to the ToDoList component that allows users to delete to-dos:
import React, { useState, useEffect } from 'react';
import axios from 'axios';

const ToDoList = () => {
  const [todos, setTodos] = useState([]);

  useEffect(() => {
    const fetchTodos = async () => {
      const res = await axios.get('http://localhost:8000/todos/');
      setTodos(res.data);
    };
    fetchTodos();
  }, []);

  const handleChange = async todo => {
    await axios.patch(`http://localhost:8000/todos/${todo.id}/`, {
      completed: !todo.completed
    });
    const updatedTodos = todos.map(t =>
      t.id === todo.id ? { ...t, completed: !t.completed } : t
    );
    setTodos(updatedTodos);
  };

  const handleDelete = async todo => {
    await axios.delete(`http://localhost:8000/todos/${todo.id}/`);
    const updatedTodos = todos.filter(t => t.id !== todo.id);
    setTodos(updatedTodos);
  };

  return (
    <ul>
      {todos.map(todo => (
        <li key={todo.id}>
          <input
            type="checkbox"
            checked={todo.completed}
            onChange={() => handleChange(todo)}
          />
          {todo.title}
          <button onClick={() => handleDelete(todo)}>Delete</button>
        </li>
      ))}
    </ul>
  );
};

export default ToDoList;
Conclusion
In this post, we walked through the steps of building a simple to-do application using Django Rest Framework and React. We created a Django project and app, installed Django Rest Framework, created a to-do model and serializer, defined a viewset and registered it in the URL patterns, set up a React app, installed dependencies, and built a to-do list component that fetches and displays to-dos from the API, and allows users to add, update, and delete to-dos.

DigitalOcean Sign Up : If you don't have a DigitalOcean account yet, you can sign up using the link below and receive $200 credit for 60 days to get started: Start your free trial with a $200 credit for 60 days link below: Get $200 free credit on DigitalOcean ( Note: This is a referral link, meaning both you and I will get credit.)
Latest From PyDjangoBoy
👩💻🔍 Explore Python, Django, Django-Rest, PySpark, web 🌐 & big data 📊. Enjoy coding! 🚀📚

