Comprehensive Linux Tutorial for Beginners with Linux Distro List
This comprehensive Linux tutorial is designed for beginners, covering essential commands, file system navigation, user management, package management, networking tools, and practical bash scripting techniques. It includes in-depth explanations.

Comprehensive Linux Tutorial for Beginners with Linux Distro List
This comprehensive Linux tutorial is designed for beginners, covering essential commands, file system navigation, user management, package management, networking tools, and practical bash scripting techniques. It includes in-depth explanations, real-world examples, and a list of various Linux distributions for download. Whether you're new to Linux or looking to expand your knowledge, this tutorial empowers you with the skills to navigate and master the Linux operating system effectively.
Introduction:
Welcome to our comprehensive Linux tutorial for beginners! This tutorial is designed to help you learn Linux from scratch and includes in-depth explanations and examples for both basic and advanced commands. Additionally, we've compiled a list of popular Linux distributions that you can download and explore.
Table of Contents:
- Introduction to Linux
- Getting Started with Linux
- Linux Distro List for Download
- Basic Linux Commands
- Advanced Linux Commands
- File System Navigation
- File Manipulation
- User and Permission Management
- Package Management
- Process Management
- Networking and Internet Tools
- Bash Scripting Basics
- Recommended Resources
1. Introduction to Linux:
Linux is an open-source operating system renowned for its stability, security, and versatility. It is widely used across servers, desktops, and various devices. Understanding Linux is a valuable skill for developers, system administrators, and enthusiasts.
2. Getting Started with Linux: Creating a Bootable USB or DVD
To get started with Linux, you'll need to create a bootable USB or DVD to install the Linux distribution of your choice on your system. This process involves downloading the Linux ISO file, creating a bootable media, and then installing the Linux operating system. Follow the steps below:
Step 1: Choose a Linux Distribution:
Select a Linux distribution from the list provided in Section 3. Choose one that suits your needs and level of expertise. For beginners, Ubuntu or Linux Mint are excellent choices.
Step 2: Download the Linux ISO:
Go to the official website of the Linux distribution you've chosen and download the ISO file for your preferred version (32-bit or 64-bit). Make sure to download the correct ISO file compatible with your computer's architecture.
Step 3: Create a Bootable USB or DVD on Windows:
Software: Rufus (for Windows)
Download Rufus from the official website: Rufus Download
Insert your USB flash drive (at least 4GB) into a USB port on your Windows computer.
Run Rufus. It should automatically detect your USB drive.
In the "Boot selection" section, click on "Select" and choose the Linux ISO file you downloaded earlier.
Leave other settings as default unless you have specific requirements.
Click on "Start" to begin the process. This will erase all data on the USB drive, so make sure to back up any important files.
Once the process is complete, you will have a bootable USB drive with the Linux distribution of your choice.
Step 4: Create a Bootable DVD on Windows:
Software: ImgBurn (for Windows)
Download ImgBurn from the official website: ImgBurn Download
Insert a blank DVD into your DVD drive.
Run ImgBurn and select "Write image file to disc."
Click on the folder icon to browse and select the Linux ISO file you downloaded earlier.
Insert a blank DVD into your DVD drive.
Set the burning speed to a moderate value to avoid errors.
Click on the "Burn" button to start the process. Once it's done, you'll have a bootable DVD with the Linux distribution.
Step 5: Boot from the Bootable USB or DVD:
Restart your computer and enter the BIOS or UEFI settings by pressing the appropriate key during startup (usually F2, F12, Delete, or Esc). Check your computer's manual or manufacturer's website for the correct key.
In the BIOS/UEFI settings, change the boot order to prioritize the USB drive or DVD drive over the internal hard drive.
Save the changes and exit the BIOS/UEFI settings.
The computer will now boot from the bootable USB or DVD. Follow the on-screen instructions to start the Linux installation process.
Step 6: Linux Installation:
The installation process will vary depending on the Linux distribution you've chosen. Follow the installation wizard, and when prompted, select the installation type (e.g., alongside Windows or as the sole operating system). Set up your time zone, keyboard layout, user account, and password.
Congratulations! You've successfully created a bootable USB or DVD and installed Linux on your system. Enjoy exploring the world of Linux!
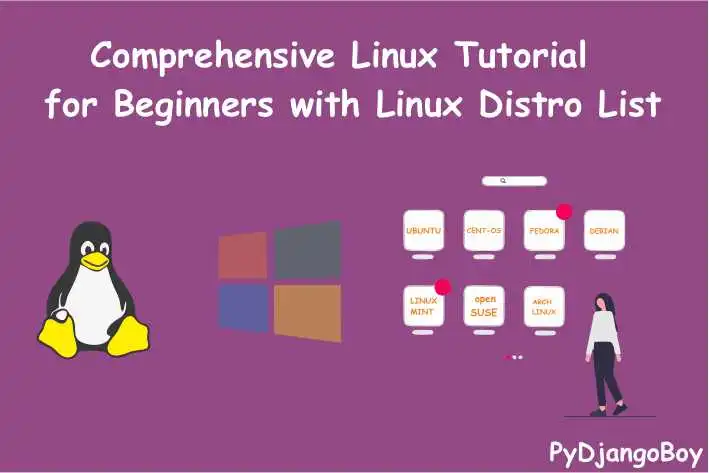
3. Linux Distro List for Download:
Here is a list of popular Linux distributions for you to choose from:
- Ubuntu - An easy-to-use and beginner-friendly Linux distribution with extensive community support.
- Fedora - A cutting-edge and feature-rich Linux distribution, ideal for developers and enthusiasts.
- Linux Mint - A user-friendly distribution known for its elegant and intuitive interface.
- Debian - A stable and widely-used Linux distribution with a vast software repository.
- openSUSE - A reliable and versatile Linux distribution with different desktop environments to choose from.
- Arch Linux - A lightweight and highly customizable distribution suited for advanced users.
- CentOS - A robust and stable Linux distribution based on Red Hat Enterprise Linux (RHEL).
- Elementary OS - An elegant and user-friendly distribution inspired by macOS.
Select the Linux distribution that best suits your needs and preferences.
Certainly! Let's provide more in-depth explanations and examples for both basic and advanced Linux commands:
4. Basic Linux Commands:
4.1. ls: List files and directories
Explanation:
The ls command displays the contents of a directory. It provides valuable information about files and subdirectories, such as permissions, ownership, size, and modification time.
Example:
lsOutput:
file1.txt file2.txt directory1 directory24.2. cd: Change directory
Explanation:
The cd command is used to change the current working directory. It allows you to navigate the file system easily by moving between directories.
Example:
cd /home/user/documents4.3. pwd: Print working directory
Explanation:
The pwd command shows the current working directory's full path. It helps you know your current location in the file system.
Example:
pwdOutput:
/home/user/documents4.4. mkdir: Make directory
Explanation:
The mkdir command is used to create a new directory (folder) in the file system.
Example:
mkdir new_directory4.5. touch: Create an empty file
Explanation:
The touch command creates an empty file with the specified name. If the file already exists, it updates its modification timestamp.
Example:
touch file.txt4.6. cp: Copy files and directories
Explanation:
The cp command is used to copy files or directories from one location to another.
Example:
cp file.txt /home/user/documents4.7. mv: Move or rename files and directories
Explanation:
The mv command is used to move files or directories from one location to another. It can also be used to rename files.
Example:
mv file.txt /home/user/documents/file_new.txt4.8. rm: Remove files and directories
Explanation:
The rm command is used to delete files or directories. Be cautious when using this command, as deleted files cannot be easily recovered.
Example:
rm unwanted_file.txt5. Advanced Linux Commands:
5.1. grep: Global Regular Expression Print
Explanation:
The grep command searches for a pattern in a file or input and prints matching lines. It is often used for text processing and pattern matching.
Example:
grep "error" logfile.txtOutput:
2023-07-25 10:15:20 - Error occurred during processing.
2023-07-25 11:30:45 - Another error reported.
5.2. find: Search for files and directories
Explanation:
The find command is used to search for files and directories based on various criteria, such as name, size, type, or modification time.
Example:
find /home/user/documents -name "*.txt"Output:
/home/user/documents/file1.txt
/home/user/documents/file2.txt
/home/user/documents/directory1/subdir/file3.txt
5.3. grep + find: Combined command for advanced searching
Explanation:
By combining grep and find, you can perform more complex searches, such as finding files containing a specific pattern.
Example:
find /var/log -type f -name "*.log" -exec grep "error" {} \;Output:
/var/log/system.log: Error occurred during processing.
/var/log/application.log: Another error reported.
5.4. tar: Archive files
Explanation:
The tar command is used to create compressed archives of files and directories. It is often used for backups and data compression.
Example:
tar -czvf archive.tar.gz /home/user/documents5.5. wget: Download files from the web
Explanation:
The wget command allows you to download files from the web directly to your Linux system.
Example:
wget https://example.com/file.zip5.6. chmod: Change file permissions
Explanation:
The chmod command is used to change file permissions (read, write, execute) for users, groups, and others.
Example:
chmod u+rwx file.txt5.7. chown: Change file ownership
Explanation:
The chown command is used to change the ownership of a file or directory.
Example:
chown newowner file.txtThese are just a few examples of the basic and advanced Linux commands available. As you continue to explore and work with Linux, you'll discover many more powerful commands that will enhance your productivity and efficiency.
6. File System Navigation:
Understanding how to navigate the Linux file system is fundamental to effectively interact with files and directories. Here are some essential commands for file system navigation:
6.1. pwd: Print working directory
Explanation:
The pwd command stands for "Print Working Directory." It displays the full path of the current directory where you are located in the file system.
Example:
pwdOutput:
/home/user/documents6.2. ls: List files and directories
Explanation:
The ls command lists the contents of the current directory. It provides information about files and subdirectories, including permissions, ownership, size, and modification time.
Example:
lsOutput:
file1.txt file2.txt directory1 directory26.3. cd: Change directory
Explanation:
The cd command is used to change the current working directory. It allows you to navigate to a different directory in the file system.
Example:
cd /home/user/documents6.4. cd ..: Move up one level
Explanation:
The cd .. command moves you up one level in the directory tree. It takes you to the parent directory of your current location.
Example:
cd ..6.5. cd ~ or cd: Move to the home directory
Explanation:
The cd ~ or simply cd (without specifying any directory) takes you to your home directory, which is the default starting location for a user.
Example:
cd ~6.6. ls -l: List files in long format
Explanation:
The ls -l command displays the contents of the current directory in long format. It provides detailed information, including permissions, owner, group, size, and modification time.
Example:
ls -lOutput:
-rw-r--r-- 1 user user  1024 Jul 25 10:00 file1.txt
-rw-r--r-- 1 user user  2048 Jul 25 11:30 file2.txt
drwxr-xr-x 2 user user  4096 Jul 25 12:00 directory1
drwx------ 3 user user  8192 Jul 25 12:30 directory2
6.7. ls -a: List all files, including hidden ones
Explanation:
The ls -a command lists all files and directories in the current directory, including hidden files and directories (those whose names begin with a dot).
Example:
ls -aOutput:
. .. file1.txt file2.txt .hidden_file directory1 directory26.8. tree: Display directory structure in a tree format
Explanation:
The tree command shows the directory structure in a tree-like format, displaying subdirectories and files hierarchically.
Example:
tree /home/user/documentsOutput:
/home/user/documents
├── file1.txt
├── file2.txt
├── directory1
│   ├── file3.txt
│   └── subdirectory1
└── directory2
6.9. find: Search for files and directories
Explanation:
The find command allows you to search for files and directories based on various criteria, such as name, size, type, or modification time.
Example:
find /home/user/documents -name "*.txt"Output:
/home/user/documents/file1.txt
/home/user/documents/file2.txt
/home/user/documents/directory1/file3.txt
File system navigation is a crucial skill for working effectively in Linux. Mastering these commands will help you explore and manage the file system efficiently, making your Linux experience smoother and more productive.
7. File Manipulation:
Certainly! Let's explore File Manipulation in Linux with more in-depth explanations and examples:
7. File Manipulation:
File manipulation commands in Linux are essential for creating, copying, moving, and deleting files and directories. Here are some of the most commonly used file manipulation commands:
7.1. touch: Create an empty file
Explanation:
The touch command is used to create an empty file with the specified name. If the file already exists, it updates its modification timestamp.
Example:
touch file.txt7.2. cp: Copy files and directories
Explanation:
The cp command is used to copy files or directories from one location to another.
Example:
cp file.txt /home/user/documents7.3. mv: Move or rename files and directories
Explanation:
The mv command is used to move files or directories from one location to another. It can also be used to rename files.
Example:
mv file.txt /home/user/documents/file_new.txt7.4. rm: Remove files and directories
Explanation:
The rm command is used to delete files or directories. Be cautious when using this command, as deleted files cannot be easily recovered.
Example:
rm unwanted_file.txt7.5. rm -r: Remove directories and their contents recursively
Explanation:
The rm -r command is used to remove directories and their contents recursively. Use it with caution, as it deletes everything inside the specified directory.
Example:
rm -r unwanted_directory7.6. mkdir: Make directory
Explanation:
The mkdir command is used to create a new directory (folder) in the file system.
Example:
mkdir new_directory7.7. rmdir: Remove empty directories
Explanation:
The rmdir command is used to remove empty directories. It only works when the directory is empty; otherwise, you need to use rm -r to delete non-empty directories.
Example:
rmdir empty_directory7.8. cat: Display file content
Explanation:
The cat command is used to display the content of a file on the terminal.
Example:
cat file.txtOutput:
This is the content of file.txt.7.9. more: Display file content page by page
Explanation:
The more command allows you to display the content of a file one page at a time. You can scroll through the file using the spacebar.
Example:
more large_file.txt7.10. less: Display file content with backward scrolling
Explanation:
The less command is similar to more, but it allows backward scrolling as well.
Example:
less large_file.txt7.11. head: Display the beginning of a file
Explanation:
The head command displays the first few lines of a file.
Example:
head file.txtOutput:
Line 1
Line 2
Line 3
7.12. tail: Display the end of a file
Explanation:
The tail command displays the last few lines of a file. It's commonly used to monitor log files.
Example:
tail file.txtOutput:
Line 8
Line 9
Line 10
File manipulation is a core aspect of working with Linux. These commands enable you to manage files and directories effectively, whether you're creating, copying, moving, or deleting them. Always exercise caution, especially when using commands like rm -r, to prevent accidental data loss.
8. User and Permission Management:
User and permission management are crucial aspects of Linux security and access control. Understanding how to manage users, groups, and file permissions is essential for securing your system and granting appropriate access to resources.
8.1. useradd: Add a new user
Explanation:
The useradd command is used to add a new user to the system.
Example:
useradd newuser8.2. passwd: Set user password
Explanation:
The passwd command allows you to set or change the password for a user account.
Example:
passwd newuser8.3. userdel: Delete a user
Explanation:
The userdel command is used to delete a user account from the system.
Example:
userdel unwanteduser8.4. groupadd: Add a new group
Explanation:
The groupadd command is used to create a new group on the system.
Example:
groupadd newgroup8.5. usermod: Modify user properties
Explanation:
The usermod command is used to modify user properties, such as the primary group or home directory.
Example:
usermod -g newgroup newuser8.6. usermod: Add user to a secondary group
Explanation:
The usermod command can also be used to add a user to a secondary group.
Example:
usermod -aG groupname username8.7. id: Display user and group information
Explanation:
The id command displays information about the current user and their group memberships.
Example:
idOutput:
uid=1000(username) gid=1000(username) groups=1000(username),4(adm),24(cdrom),27(sudo),30(dip),46(plugdev),116(lpadmin),126(sambashare)8.8. chmod: Change file permissions
Explanation:
The chmod command is used to change file permissions (read, write, execute) for users, groups, and others.
Example:
chmod u+rwx file.txt8.9. chown: Change file ownership
Explanation:
The chown command is used to change the ownership of a file or directory.
Example:
chown newowner file.txt8.10. chgrp: Change group ownership
Explanation:
The chgrp command is used to change the group ownership of a file or directory.
Example:
chgrp newgroup file.txt8.11. su: Switch user
Explanation:
The su command allows you to switch to another user account or the root (superuser) account.
Example:
su otheruser8.12. sudo: Execute a command as the superuser
Explanation:
The sudo command allows authorized users to execute commands with superuser privileges.
Example:
sudo apt-get updateProper user and permission management are essential for maintaining the security and integrity of your Linux system. Make sure to grant appropriate permissions to files and directories to ensure that users have the necessary access and avoid any unauthorized changes. Use the sudo command with caution, as it grants extensive system privileges. Always keep your system secure by regularly reviewing user accounts and access rights.
9. Package Management:
9.1. apt: Advanced Package Tool (Debian/Ubuntu)
Explanation:
apt is a package management tool used in Debian-based distributions like Ubuntu. It allows users to manage software packages and dependencies.
Examples:
Install a package:
sudo apt-get install package_nameUpdate package list (to get the latest package information):
sudo apt-get updateUpgrade installed packages:
sudo apt-get upgradeRemove a package:
sudo apt-get remove package_name
9.2. yum: Yellowdog Updater Modified (RHEL/CentOS)
Explanation:
yum is a package management tool used in Red Hat-based distributions like CentOS. It simplifies software installation and updates.
Examples:
Install a package:
sudo yum install package_nameUpdate all packages:
sudo yum updateRemove a package:
sudo yum remove package_name
9.3. dnf: Dandified YUM (Fedora)
Explanation:
dnf is the next-generation package manager used in Fedora, which improves upon the YUM package manager.
Examples:
Install a package:
sudo dnf install package_nameUpdate all packages:
sudo dnf updateRemove a package:
sudo dnf remove package_name
9.4. zypper: Package Manager (openSUSE)
Explanation:
zypper is the package manager used in openSUSE, allowing users to install, update, and remove software packages.
Examples:
Install a package:
sudo zypper install package_nameUpdate all packages:
sudo zypper updateRemove a package:
sudo zypper remove package_name
9.5. pacman: Package Manager (Arch Linux)
Explanation:
pacman is the package manager used in Arch Linux and its derivatives, providing an efficient way to manage software.
Examples:
Install a package:
sudo pacman -S package_nameUpdate all packages:
sudo pacman -SyuRemove a package:
sudo pacman -R package_name
9.6. snap: Package Manager (Snap)
Explanation:
snap is a universal package manager used in various Linux distributions. It allows the installation of software packages with all their dependencies bundled.
Examples:
Install a package:
sudo snap install package_nameUpdate a package:
sudo snap refresh package_nameRemove a package:
sudo snap remove package_name
Package management is essential for keeping your Linux system up-to-date and managing software efficiently. Understanding the package manager specific to your distribution will greatly assist you in installing, updating, and removing software packages with ease.
10. Process Management:
Certainly! Process management is a crucial aspect of Linux administration, enabling users to monitor, control, and interact with running processes on the system. Here are various commands for managing processes in Linux with detailed explanations and examples:
10.1. ps: Process Status
Explanation:
The ps command displays information about the current processes running on the system.
Examples:
Display all processes running in the current terminal session:
psDisplay detailed information about all processes running on the system (including those by other users):
ps -efDisplay processes in a tree-like format to see their relationships:
ps -e --forest
10.2. top: Interactive Process Viewer
Explanation:
The top command provides a real-time, interactive view of running processes. It continuously updates the process list and resource usage.
Example:
top10.3. htop: Interactive Process Viewer (Improved top)
Explanation:
htop is an enhanced version of top, offering better user experience and more advanced features.
Example:
htop10.4. kill: Terminate a Process
Explanation:
The kill command is used to terminate a process by sending a signal to it. The default signal is SIGTERM (15), which allows the process to perform cleanup tasks before terminating. If necessary, you can use SIGKILL (9) to force a process to terminate immediately.
Examples:
Terminate a process using its PID (Process ID):
kill PIDTerminate a process by its name using
pkill:pkill process_nameForcefully terminate a process using SIGKILL:
kill -9 PID
10.5. killall: Terminate Processes by Name
Explanation:
The killall command is used to terminate processes by their names.
Example:
killall process_name10.6. renice: Change Process Priority
Explanation:
The renice command is used to change the priority of a running process. It allows you to adjust the CPU priority and resource allocation for a process.
Example:
renice -n 10 -p PID10.7. bg: Move a Process to the Background
Explanation:
The bg command moves a suspended process to the background, allowing it to continue running.
Example:
bg %job_number10.8. fg: Move a Process to the Foreground
Explanation:
The fg command moves a process running in the background to the foreground, allowing you to interact with it.
Example:
fg %job_number10.9. pstree: Display Process Hierarchy
Explanation:
The pstree command displays a tree-like representation of the current processes and their relationships.
Example:
pstree10.10. systemctl: Control Systemd Services
Explanation:
systemctl is used to manage system services using the systemd init system. It enables you to start, stop, enable, and disable services.
Examples:
Start a service:
sudo systemctl start service_nameStop a service:
sudo systemctl stop service_nameEnable a service to start on boot:
sudo systemctl enable service_nameDisable a service from starting on boot:
sudo systemctl disable service_name
Process management is essential for monitoring system resources, controlling running processes, and ensuring the smooth operation of your Linux system. Using these commands wisely will help you effectively manage processes and keep your system running efficiently.
11. Networking and Internet Tools:
Networking and Internet tools are vital for managing network connections, troubleshooting connectivity issues, and exploring network-related information. Below are various commands for networking and Internet-related tasks in Linux, along with detailed explanations and examples:
11.1. ping: Check Network Connectivity
Explanation:
The ping command is used to check network connectivity to a specific host by sending ICMP echo requests and waiting for ICMP echo replies.
Example:
ping www.google.com11.2. ifconfig (or ip command): Network Interface Configuration
Explanation:
The ifconfig command (or the more modern ip command) displays the configuration of network interfaces on your system.
Examples:
Display network interface information:
ifconfigDisplay IP addresses of all network interfaces:
ip address show
11.3. netstat: Network Statistics
Explanation:
The netstat command displays network-related statistics, including open ports, active connections, and routing tables.
Example:
- Display all active network connections:
netstat -tuln
11.4. nslookup (or dig): DNS Query
Explanation:
The nslookup command (or dig command) is used to query DNS (Domain Name System) servers and retrieve DNS records for a given domain.
Examples:
Perform a DNS lookup:
nslookup www.example.comUse
digfor more detailed DNS information:dig www.example.com
11.5. traceroute (or tracepath): Trace Route
Explanation:
The traceroute command (or tracepath command) traces the route packets take from your system to a remote host, showing each hop along the way.
Example:
traceroute www.example.com11.6. wget: Download Files from the Web
Explanation:
The wget command allows you to download files from the web directly to your Linux system.
Example:
wget https://example.com/file.zip11.7. curl: Transfer Data with URLs
Explanation:
The curl command is used to transfer data to or from a server using various protocols, including HTTP, HTTPS, FTP, etc.
Example:
curl https://example.com/api/data11.8. ssh: Secure Shell
Explanation:
The ssh command allows you to securely connect to a remote system over the network and execute commands on that system.
Example:
ssh username@remote_host11.9. scp: Secure Copy
Explanation:
The scp command is used to securely copy files between local and remote systems over an SSH connection.
Example:
scp file.txt username@remote_host:/path/to/destination11.10. nmap: Network Mapper
Explanation:
The nmap command is a powerful network scanning tool used to discover hosts and services on a computer network.
Example:
nmap -sP 192.168.0.0/24These networking and Internet tools are essential for diagnosing and troubleshooting network-related issues, as well as exploring network information. With these commands, you can effectively manage your network connections and ensure smooth communication over the Internet.
12. Bash Scripting Basics:
Bash scripting is a fundamental skill for Linux administrators and power users. It allows you to automate tasks, create custom tools, and execute sequences of commands. Let's explore the basics of Bash scripting with detailed explanations and examples:
12.1. What is Bash?
Bash stands for "Bourne Again SHell." It is a Unix shell, which is a command-line interface for interacting with the operating system. Bash is the default shell on most Linux distributions and macOS.
12.2. Creating a Bash Script:
To create a Bash script, follow these steps:
Open a text editor (e.g.,
nano,vim,gedit) on your Linux system.Start the script with the shebang line, which tells the system which shell should be used to execute the script. For Bash, use:
#!/bin/bashAdd your Bash commands below the shebang line.
Save the file with a
.shextension (e.g.,myscript.sh).Make the script executable using the
chmodcommand:chmod +x myscript.sh
12.3. Variables:
Variables are used to store data in Bash scripts. They can hold strings, numbers, or any other type of data.
Example:
#!/bin/bash

# Define variables
name="John"
age=30

# Use variables in a command
echo "My name is $name and I am $age years old."
12.4. Command-Line Arguments:
Bash scripts can accept command-line arguments, allowing you to provide input when running the script.
Example:
#!/bin/bash

# Access command-line arguments using $1, $2, etc.
echo "Hello, $1!"
Run the script with an argument:
./greet.sh AliceOutput:
Hello, Alice!12.5. Input and Output:
You can read input from users and display output using the read and echo commands.
Example:
#!/bin/bash

# Prompt the user for input
read -p "Enter your name: " name

# Display the input
echo "Hello, $name!"
12.6. Conditional Statements:
Conditional statements allow you to make decisions based on conditions using if, elif, and else.
Example:
#!/bin/bash

read -p "Enter your age: " age

if (( age >= 18 )); then
  echo "You are an adult."
else
  echo "You are a minor."
fi
12.7. Loops:
Loops enable you to execute a block of code repeatedly.
Example - for loop:
#!/bin/bash

# Loop through a list of names
names=("Alice" "Bob" "Charlie")

for name in "${names[@]}"; do
  echo "Hello, $name!"
done
Example - while loop:
#!/bin/bash

# Read user input until 'quit' is entered
while true; do
  read -p "Enter a word (or 'quit' to exit): " word
  if [[ "$word" == "quit" ]]; then
    break
  fi
  echo "You entered: $word"
done
12.8. Functions:
Functions allow you to define reusable blocks of code within your script.
Example:
#!/bin/bash

# Define a function
greet() {
  echo "Hello, $1!"
}

# Call the function
greet "Alice"
Output:
Hello, Alice!12.9. Comments:
Comments in Bash start with the # symbol and are used to add explanatory notes to the code.
Example:
#!/bin/bash

# This is a comment explaining the purpose of the script

# Define a variable
name="John"

# Display a message
echo "Hello, $name!"
Bash scripting allows you to automate tasks, create custom tools, and perform complex operations on your Linux system. With these basics, you can start writing simple scripts and gradually build more sophisticated solutions to streamline your workflow and optimize your tasks.
13. Recommended Resources:
For more in-depth information and advanced tutorials, check out the following resources:
Here are some recommended resources and documentation to further enhance your understanding and expertise in Linux:
1. Linux Documentation Project (LDP):
The Linux Documentation Project provides a wealth of information, tutorials, and guides covering various aspects of Linux. It includes how-tos, FAQs, and detailed documentation on specific Linux distributions.
- Website: http://www.tldp.org/
2. Bash Guide for Beginners:
This guide is a comprehensive resource for learning Bash scripting, from the basics to more advanced concepts.
- Link: Bash Guide for Beginners
3. LinuxCommand.org:
LinuxCommand.org offers interactive tutorials for learning the Linux command line. It covers essential command-line tools and provides practical examples.
- Website: http://linuxcommand.org/
4. GNU Bash Manual:
The official GNU Bash manual provides in-depth information about the Bash shell and its features.
- Link:GNU Bash Manual
5. Linux Journey:
Linux Journey is an interactive online tutorial that covers various topics in Linux, from basic command-line usage to more advanced system administration.
- Website: https://linuxjourney.com/
6. ArchWiki:
The ArchWiki is a comprehensive resource that covers not only Arch Linux-specific topics but also general Linux concepts and configuration details.
- Website: https://wiki.archlinux.org/
7. Ubuntu Documentation:
The Ubuntu Documentation provides guides, tutorials, and tips specifically tailored to Ubuntu users, but many concepts apply to other Linux distributions as well.
- Website: https://help.ubuntu.com/
8. Linux Subreddit:
The Linux subreddit (r/linux) is a community forum where users and enthusiasts discuss various Linux-related topics, share news, and seek help or advice.
9. Linux Forums:
Various Linux forums, such as LinuxQuestions.org and LinuxForums.org, offer platforms for asking questions, seeking advice, and interacting with the Linux community.
10. GitHub:
GitHub hosts numerous open-source projects and repositories related to Linux and Bash scripting. You can explore and contribute to various projects to enhance your skills.
- Website: https://github.com/
These resources cover a wide range of topics and are valuable for both beginners and experienced Linux users. Continuously learning from these references will help you gain a deeper understanding of Linux and become more proficient in using and administering your Linux system.
Conclusion:
Now that you have access to this comprehensive Linux tutorial and a variety of Linux distributions to choose from, take the first step towards becoming a skilled Linux user. Embrace the learning process, explore the possibilities, and have fun with Linux!

DigitalOcean Sign Up : If you don't have a DigitalOcean account yet, you can sign up using the link below and receive $200 credit for 60 days to get started: Start your free trial with a $200 credit for 60 days link below: Get $200 free credit on DigitalOcean ( Note: This is a referral link, meaning both you and I will get credit.)
Latest From PyDjangoBoy
👩💻🔍 Explore Python, Django, Django-Rest, PySpark, web 🌐 & big data 📊. Enjoy coding! 🚀📚